Introduction
This project explores a game-ready morphing rig where the transformation is fully animatable not hidden behind effects, using a single, consistent control setup.
Big thanks to my mentor Viktor Gustafsson, IOI. Who pointed me in the right direction regarding what the blendshapes needed to have to be able to morph and Jon Von Letscher who created the characters with same vertex IDs. Animation by Alfred Nilsson.
- One rig. Two anatomies. Zero control switching.
- Supports extreme proportion changes without breaking animation.
- Clean morphing via shared topology (matching vertex IDs).
- Dual blendshape system: Animator and Unreal Engine
- Adaptive control spaces for different body orientations.
- Offset-safe FK system with corrective SDKs.
- Dual IK leg setup for structural stability.
- Spring solver for dynamic stretch and motion.
- Game ready, Unreal implemented.
Proportion Blending
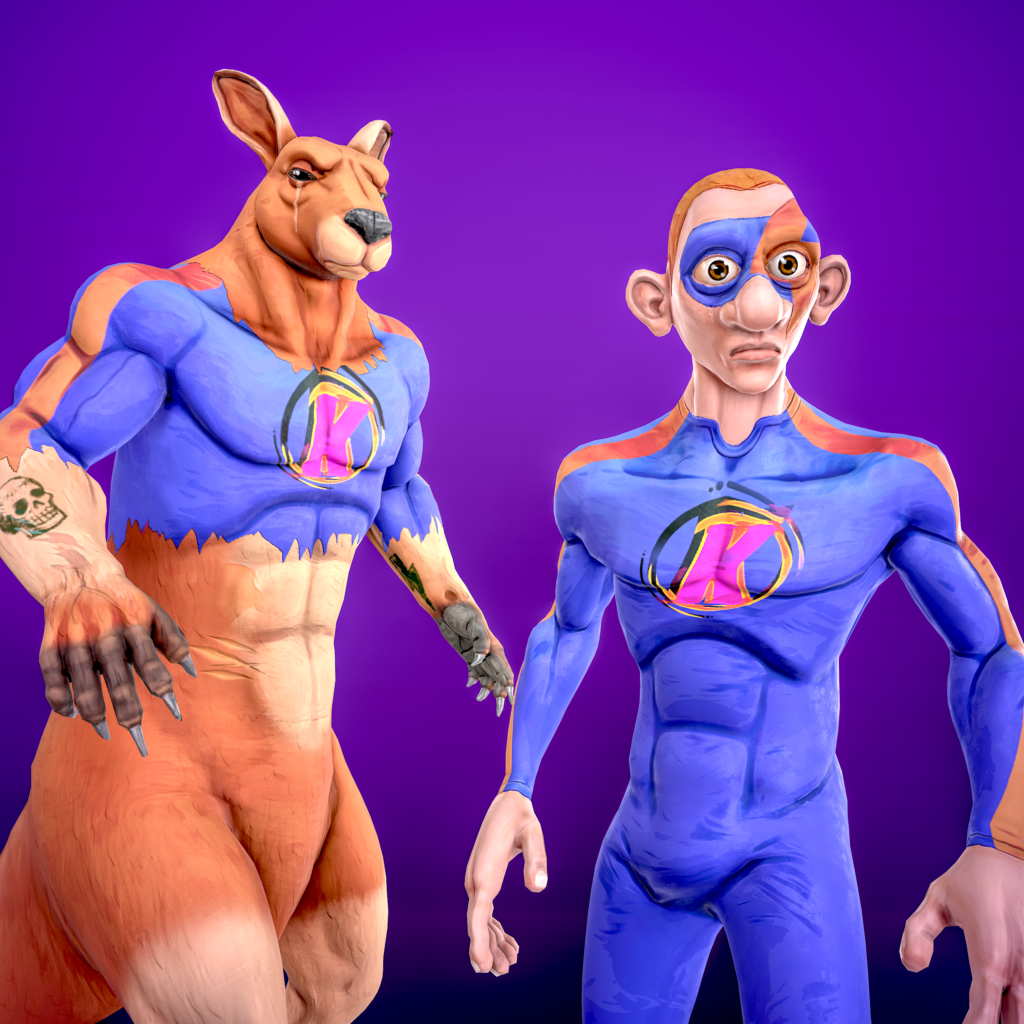
The rig blends between two characters with fundamentally different proportions, allowing continuous animation from human to kangaroo.
This is not a standard morph between similar shapes, both characters differ in limb length, posture, and overall scale.
Blending them directly caused instability in deformation and broke the continuity of the animation.
To support this, both meshes were sculpted to share identical topology, with matching vertex IDs, this was done by Jon.
Vertices were rearranged to align across both forms, allowing controlled interpolation between shapes.
Instead of relying on scale, joint transformations were carefully managed to handle proportional differences during the blend.
Deformation Overlap (Mesh vs Skeleton)
Deformation from blendshapes and the skeleton has to work together without interfering during the morph.
Both the skeleton and blendshapes were influencing the same vertices during transformation.
Early on, this created conflicts where deformation overlapped, making it difficult to maintain consistent motion and control.
The system was structured so that the skeleton remains the primary driver of movement.
Blendshapes were adjusted to compensate for the offsets they introduced, with vertices edited to match the corrected, un-offset positions.
This ensures that when the skeleton moves, the mesh adapts accordingly rather than conflicting with it.
This establishes a predictable deformation pipeline where the skeleton drives motion and the mesh adapts to it, eliminating double transformations and reducing the need for complex rig-side corrections.
Rig System
A unified FK system drives both character forms, maintaining consistent control despite large proportional differences.
When reconstructing the hierarchy after repositioning joints, offsets accumulated across the chain, causing misalignment and unstable rotations.
To resolve this, offset groups were introduced to isolate transformations. Corrective Set Driven Keys were then used to stabilize joint orientations during the morph, ensuring predictable behavior.
The system maintains stable and consistent FK control across both forms without introducing double transforms or drifting offsets.
IK System
The leg structure changes significantly between the human and kangaroo forms, making a standard IK chain unreliable.
A single IK setup could not consistently follow the animation skeleton during the morph, as the underlying proportions and joint behavior were fundamentally different.
Instead of relying on a single IK chain, two separate IK systems were created each representing a different structural state.
- Both IK chains continuously follow the same foot control
- The animation skeleton blends between the two IK solutions during the morph
- This allows each IK setup to handle the specific requirements of its corresponding form
- Spring IK solver where used on Kangaroo to handle the extreme pose
The system maintains stable foot control and consistent behavior throughout the transformation, avoiding the instability of a single IK solution while supporting anatomical changes.
Unreal Engine Integration
The rig was adapted for real-time use in Unreal Engine, ensuring that both deformation and animation behave reliably outside of the Autodesk Maya environment.
The original rig relied on systems that do not translate directly to Unreal Engine, including:
- Weighted blendshape setup that did translate correctly in Unreal
- Texture blending logic
This caused inconsistencies between the Maya rig and the in-engine result. To address this, the rig was split into two complementary systems that has the same driver:
- Animator blendshape setup (Maya) for control and deformation
- Engine-optimized blendshape setup (Unreal) for playback and performance
Blendshape data and animation were baked and restructured to ensure compatibility, while preserving the intended deformation. The character maintains consistent behavior between Maya and Unreal, with reliable animation playback and stable deformation in real time.
Material Blending In Unreal
While the geometry morphs through blendshapes, the materials do not automatically adapt to these transformations. A simple linear blend would be the basic approach, but it fails to accurately represent how the fabric shifts on the characters.
The solution was to mask specific body parts, linking each mask to its corresponding blendshape, allowing the blendshape to drive the texture blending via a shader that simulates tearing.
The final implementation uses a tearing texture controlled by the animation. The blend amount is sent to a material collection within the blueprint, which the shader then receives, normalizes, and uses to animate the shader.